
Gexpress Is a Startup Dedicated to You. Shop With Confidence—Refunds Are Easy Through !

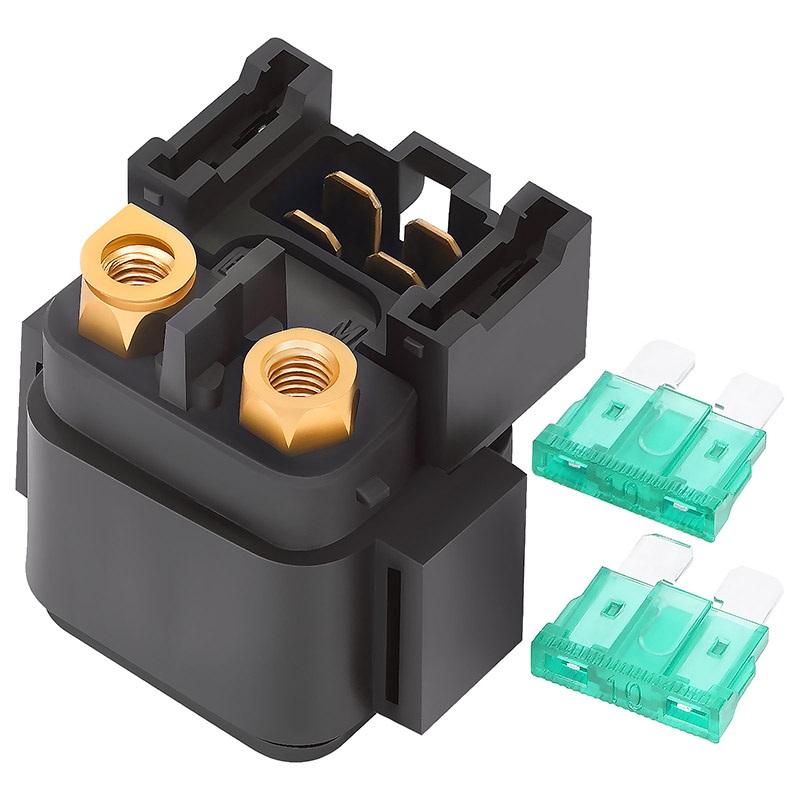
Product Installation Guide for Motorcycle Starter Relay
Tools Required:
- Socket Wrench Set
- Screwdriver Set (Philips and Flathead)
- Wire Cutters/Strippers
- Pliers
- Torque Wrench (if specified in your motorcycle’s manual)
- Electrical Tape or Heat Shrink Tubing
- Multimeter (for testing)
- Safety Glasses and Gloves
9.Cleaning Cloth
Installation Steps:
-
Prepare Your Workspace:
Ensure you have a clean and well-lit space to work in. Place your motorcycle on a stable surface to prevent any accidents. -
Remove Seat or Fairings (if necessary):
Depending on the motorcycle model, you may need to remove the seat or side fairings to access the starter relay. Use your screwdriver set to carefully detach any screws or fasteners. -
Locate the Old Starter Relay:
Typically, the starter relay is located near the battery. Reference your motorcycle's service manual for its exact position. -
Disconnect the Battery:
For safety, disconnect the negative (-) terminal of the battery before proceeding to remove the old starter relay. -
Remove the Old Starter Relay:
Disconnect the wiring harness connected to the old starter relay. Use the socket wrench to remove any bolts securing it in place. Take note of the wiring configuration for reinstallation. -
Install the New Starter Relay:
Position the new starter relay in the same location as the old one. Secure it in place using bolts, and reconnect the wiring harness according to the notes you made earlier. -
Reconnect the Battery:
Reconnect the negative (-) terminal of the battery. -
Test the Installation:
Use a multimeter to check if there is proper voltage at the relay terminals. Ensure connections are secure. -
Reassemble the Motorcycle:
If you removed the seat or fairings, reassemble them now, ensuring all screws and fasteners are properly tightened. -
Final Check:
Start your motorcycle to test if the starter relay is functioning correctly. Observe for any unusual sounds or issues during startup.
Safety Precautions:
- Always wear safety glasses and gloves while performing the installation.
- Ensure the motorcycle is turned off before starting the installation.
- Dispose of the old starter relay in accordance with local regulations.
By following these steps, you'll have successfully installed your new motorcycle starter relay. Thank you for choosing our product!

