
Gexpress Is a Startup Dedicated to You. Shop With Confidence—Refunds Are Easy Through !

Motorcycle and light motorcycle accessories
US /en/
USD
Hello, Sign In
Account & Lists
Cart
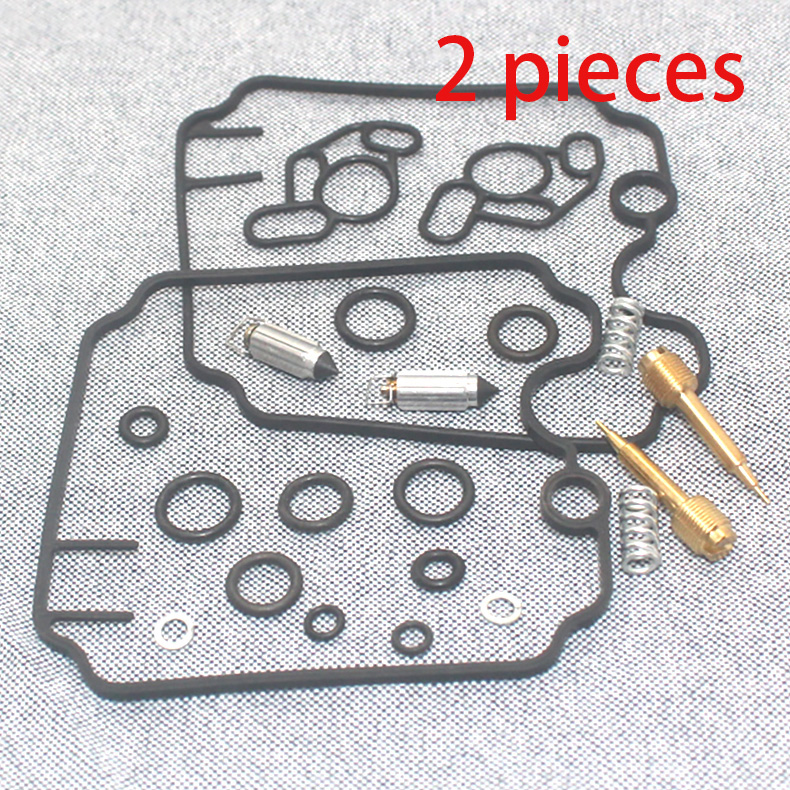
compatible carburetor repair kits for 900SS 750SS 600SS supersport models from 1991 to 1998 available in our store
112 Sold
USD 8.08USD8.32
95% Limited Time
About This Item
Strong Compatibility: This repair kit is a perfect match for 900SS, 750SS and 600SS super sports models from 1991 to 1998, ensuring smooth operation.
Comprehensive: The kit contains all necessary parts for easy repair and replacement to improve engine performance.
Easy installation: The intuitive design and easy-to-understand instructions allow users to quickly complete the installation without the need for professional tools.
Improve performance: Help restore and improve the vehicle's power performance by replacing damaged parts in a timely manner.
Affordable: This repair kit provides a more cost-effective solution than purchasing a new carburetor.
Sold To
United States
USD 6.01
Delivery: 7-15 Business Days
Fast Delivery
Refund If Package Lost
Refund If Items Damaged
Refund If No Delivery in 30 Days
Quantity
1
Installation Instructions


Here is a product installation guide in English:
Compatible Carburetor Repair Kit for 1991-1998 900SS, 750SS, and 600SS SuperSport Models
Tools Required:
- Socket wrench or ratchet and socket set
- Torx screwdriver (for removing air filter housing screws)
- Phillips screwdriver (for removing dash trim and other interior components)
- Pliers or punch (for removing old O-rings and seals)
- Clean rag and compressed air (for cleaning the carburetor area)
- New gaskets and seals (included in the repair kit)
- Allen wrench (for adjusting the carburetor needle valves)
Step-by-Step Installation Instructions:
- Remove the air filter housing: Use a Torx screwdriver to remove the screws holding the air filter housing in place. Gently pull the housing away from the carburetor.
- Disconnect the intake duct: Use a wrench or pliers to loosen the clamp holding the intake duct to the carburetor.
- Remove the old gaskets and seals: Use pliers or a punch to remove the old O-rings and seals from the carburetor mounting surfaces.
- Install the new gaskets and seals: Apply a small amount of gasket sealant to the new gaskets and seals, then press them onto the carburetor mounting surfaces.
- Install the new carburetor: Carefully lift the new carburetor into place, ensuring it is properly seated on the gaskets and seals.
- Reconnect the intake duct: Tighten the clamp holding the intake duct to the carburetor.
- Reinstall the air filter housing: Tighten the screws holding the air filter housing in place.
- Adjust the carburetor needle valves: Use an Allen wrench to adjust the needle valves to the recommended specifications.
- Check for leaks: Start the engine and check for any leaks around the carburetor area.
Note: Refer to your owner's manual for specific instructions and recommendations for your particular vehicle. If you are not comfortable with this installation, it is recommended that you seek the assistance of a qualified mechanic.
Description
Material: Rubber, Copper
Quantity: 2 sets / 4 sets
Type: Carburetor Repair
Durable
TAG:
Motorcycle and light motorcycle accessories
Related Items

