
Gexpress Is a Startup Dedicated to You. Shop With Confidence—Refunds Are Easy Through !

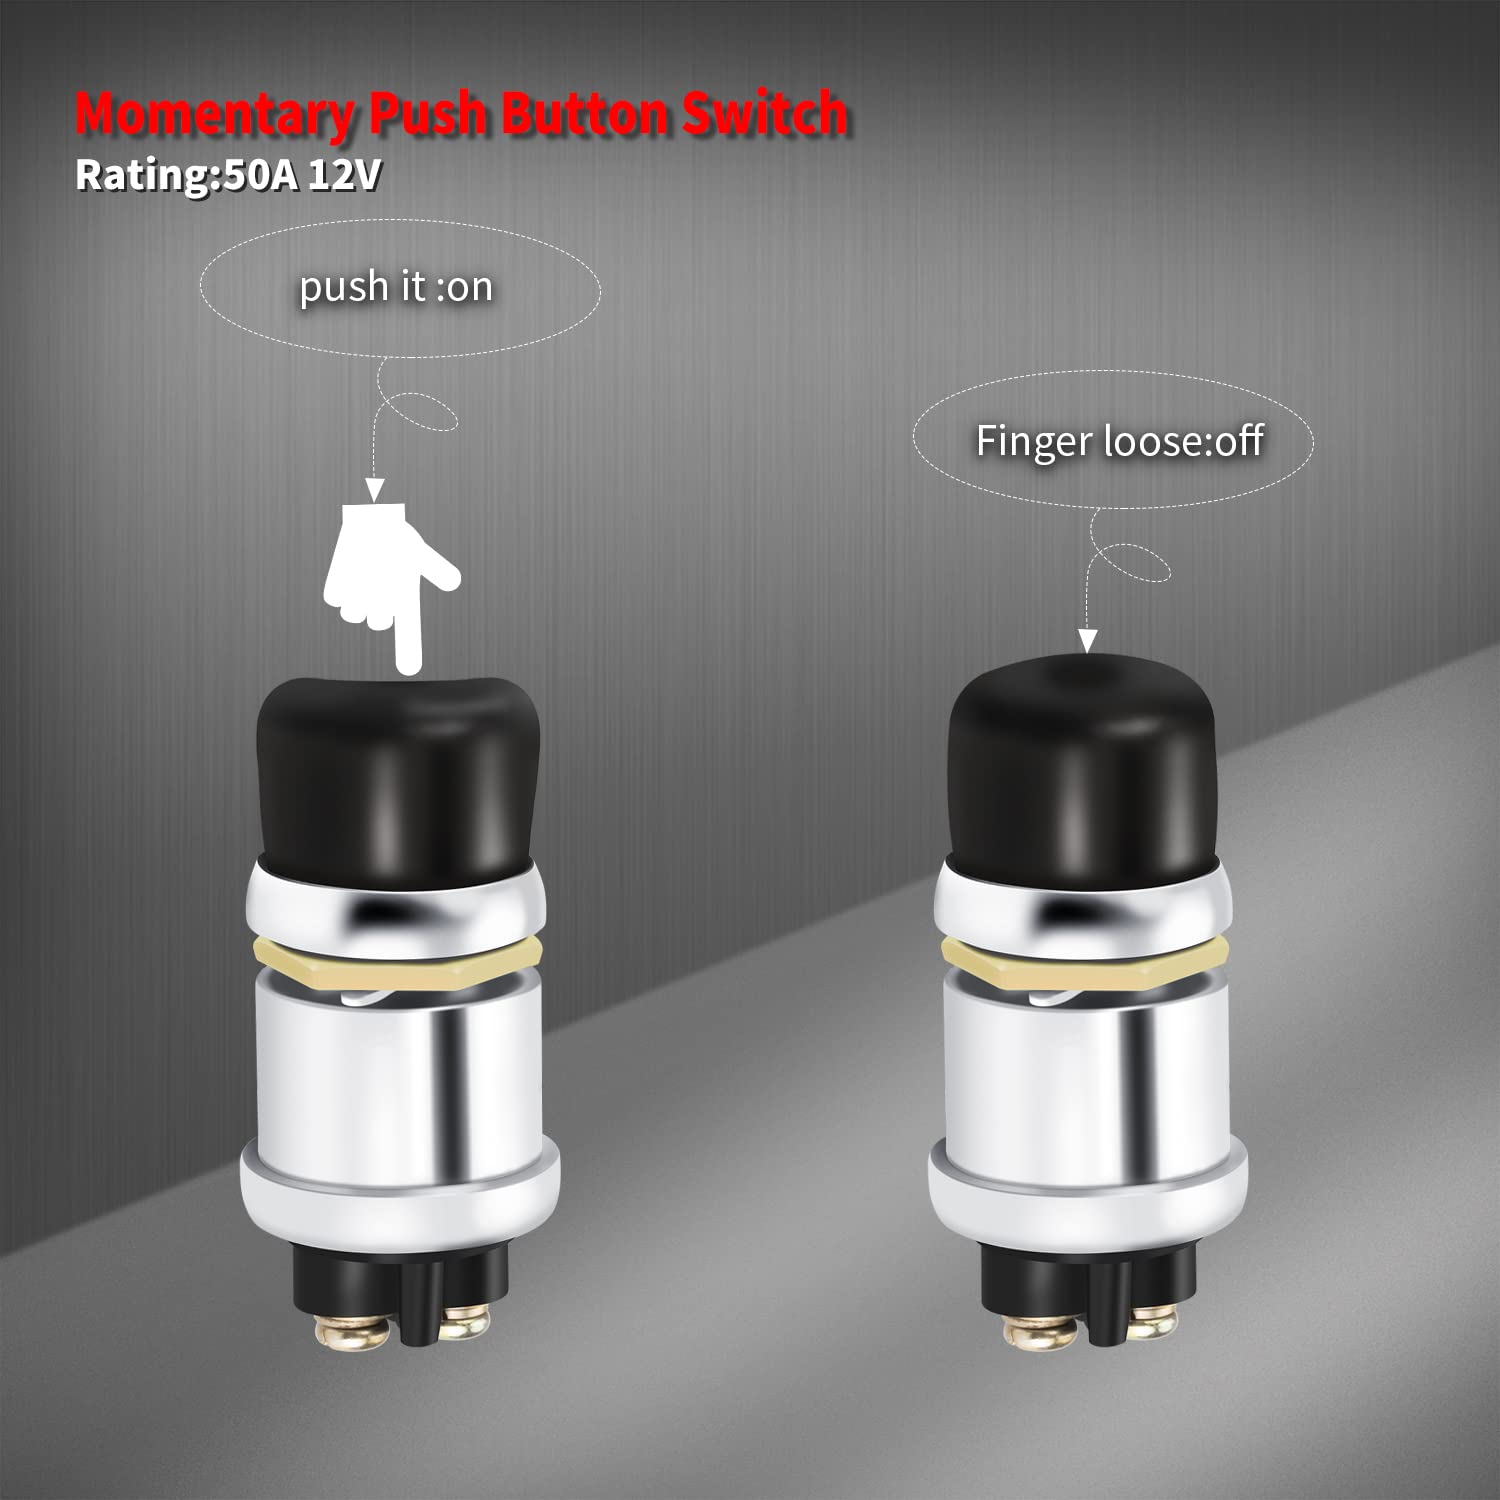

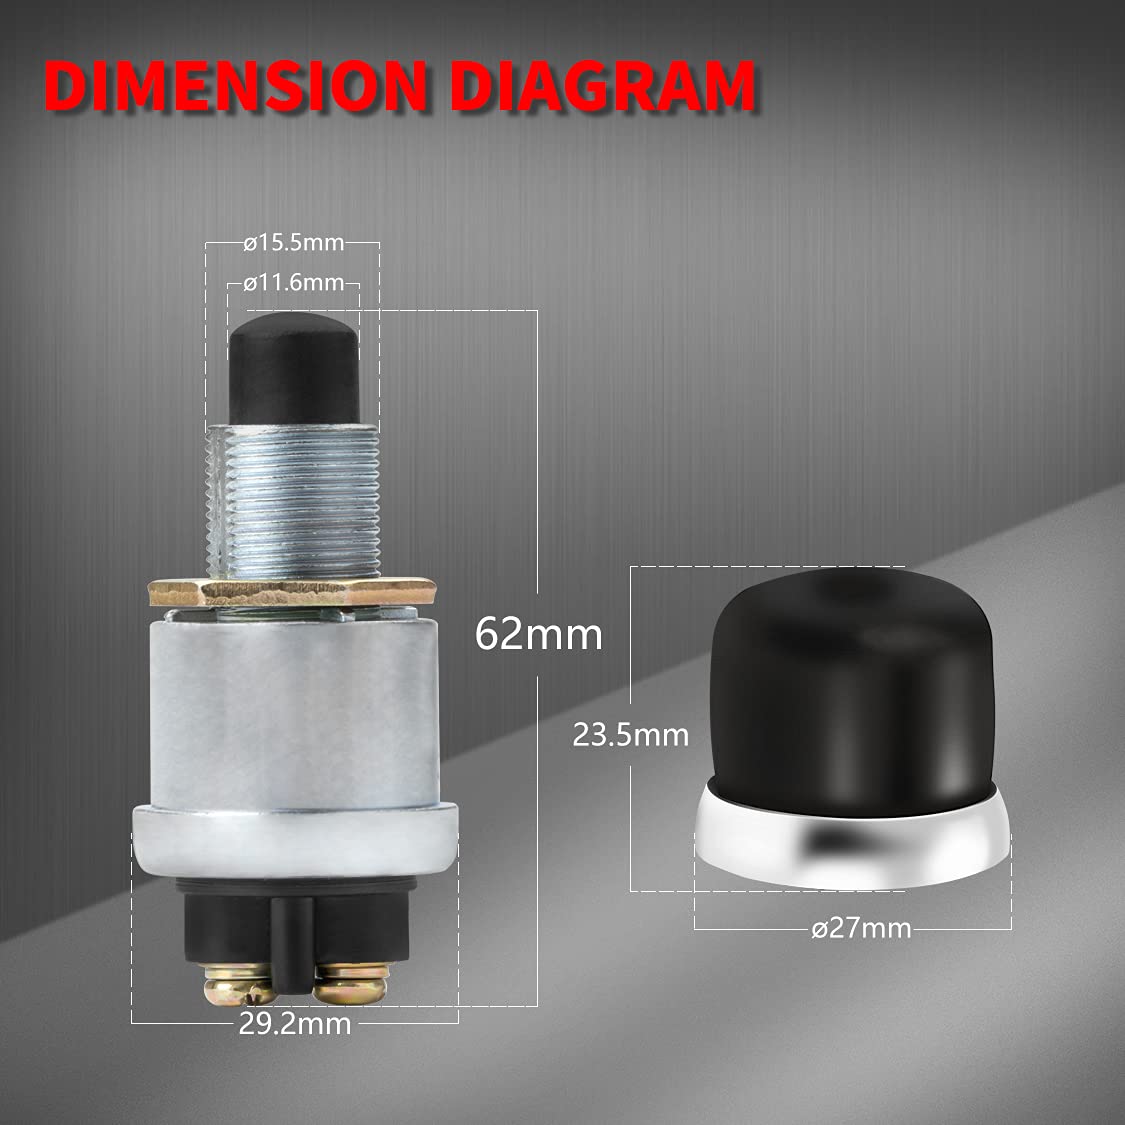
Installation Instructions for 12V 60A Waterproof DC Engine Start Switch and Ignition Push Button
Tools Required:
- Screwdriver Set: A flat-head and a screwdriver for securing the switch and connections.
- Wire Strippers: To strip the insulation off the wires for proper connection.
- Electrical Tape: For securing and insulating exposed wire connections.
- Wrench Set: To tighten any nuts or bolts during installation, if necessary.
- Drill (if applicable): To create mounting holes if you need to install the switch in a new location.
- Heat Shrink Tubing (optional): For additional insulation of wire connections.
Installation Steps:
-
Disconnect the Battery: Before starting the installation, disconnect the negative terminal of the battery to prevent any electrical shocks or short circuits.
-
Choose Mounting Location: Select a suitable location for the switch on the dashboard or control panel. Ensure it is easily accessible and visible.
-
Prepare the Wiring: Use wire strippers to remove insulation from the ends of the wires connecting the switch to the ignition and other components.
-
Mount the Switch: Use the drill (if necessary) to create holes for mounting the switch, and secure it in place using screws and a screwdriver.
-
Connect Wires: Follow the wiring diagram provided with the switch to connect the appropriate wires. Make sure to connect the power, ignition, and ground wires securely.
-
Insulate Connections: Use electrical tape or heat shrink tubing to insulate all exposed wire connections to prevent accidental short circuits.
-
Reconnect the Battery: After all connections are made and secured, reconnect the negative terminal of the battery.
-
Test the Switch: Turn on the ignition and test the switch to ensure it operates as expected. Check all functions including engine start and horn operation.
-
Final Check: Ensure all connections are secure and that the switch operates smoothly.
Caution: Always refer to the vehicle’s or boat’s manual for specific wiring diagrams and connections. If unsure about any step, consult a professional for assistance.
By following these steps and using the necessary tools, you’ll successfully install the 12V 60A Waterproof DC Engine Start Switch and Ignition Push Button in your vehicle or marine application.

